使用 clangd 作为 C/C++ 的 LSP 服务器。下载地址:https://github.com/clangd
下载后解压,将clangd的bin目录添加进windows系统的PATH环境变量里。
打开cmd,输入clangd -version,输出版本号说明测试clangd的配置正确
clangd -version
clangd version 12.0.0 (https://github.com/clangd/llvm-project 8a844a3a321ea56da21af4d48433ad493b1bcfae)
到官网https://neovim.io/ 下载neovim。
直接解压就能用,我测试使用的是neovim 0.6版本,我使用的是非常旧的版本为了测试。正常应该使用最新版。现在的最新版是0.11版本。
使用插件nvim-lspconfig配置nvim的lsp功能
使用插件nvim-cmp作为代码补全引擎
使用插件cmp-nvim-lsp实现lsp方式代码补全
插件cmp-buffer和cmp-path是通过缓冲区和路径补全代码,我没有测试
插件下载地址
:: 核心补全引擎
git clone https://github.com/hrsh7th/nvim-cmp
git clone https://github.com/hrsh7th/cmp-nvim-lsp
git clone https://github.com/hrsh7th/cmp-buffer
git clone https://github.com/hrsh7th/cmp-path

:: LSP 配置插件 (必须)
git clone https://github.com/neovim/nvim-lspconfig
创建插件目录,进入nvim输入下面的命令查看配置文件夹
:echo stdpath("config")
对于windows,一般用户配置目录是C:\Users\<用户名>\AppData\Local\nvim\,如果没有这个文件夹,需要创建一个。并且递归创建下面的文件夹
nvim\pack\my-plugins\start
把nvim-cmp、cmp-nvim-lsp、nvim-lspconfig插件解压,放到nvim\pack\my-plugins\start目录下。注意需要确保插件解压后的目录里直接是文件夹内容。
正确的结构是
start/
└── nvim-cmp/
    ├── lua/
    │   └── cmp.lua
    ├── README.md
    └── ...
└── cmp-nvim-lsp/
    ├── lua/
    │   └── cmp_nvim_lsp.lua
    └── ...
└── nvim-lspconfig/
    ├── lua/
    │   └── lspconfig/
    └── ...
错误的结构是
start/
└── nvim-cmp/
    └── nvim-cmp-main/  ← 这一层是多余的!
        ├── lua/
        └── ...
编写配置文件
编辑或创建init.lua 文件放在nvim\目录下,我这是AI生成的针对nvim 0.6的旧版,极其精简的配置代码,对于新版的nvim已经完全失效。对于新版nvim应该使用AI重新确定配置文件代码。
-- 调试版配置
vim.cmd([[set shortmess+=c]]) -- 不要给补全消息给予 'ins-completion-menu' 消息

-- 打印调试信息函数
local function debug_print(msg)
    vim.cmd('echom "' .. msg .. '"')
end

debug_print("开始加载配置...")

-- 检查插件是否成功加载
local ok, cmp = pcall(require, 'cmp')
if not ok then
    debug_print("错误: 无法加载 nvim-cmp")
    return
end
debug_print("nvim-cmp 加载成功")

local ok, lspconfig = pcall(require, 'lspconfig')
if not ok then
    debug_print("错误: 无法加载 lspconfig")
    return
end
debug_print("lspconfig 加载成功")

local ok, cmp_nvim_lsp = pcall(require, 'cmp_nvim_lsp')
if not ok then
    debug_print("错误: 无法加载 cmp_nvim_lsp")
    return
end
debug_print("cmp_nvim_lsp 加载成功")

-- 配置 nvim-cmp
cmp.setup({
    enabled = function()
        return vim.api.nvim_buf_get_option(0, "buftype") ~= "prompt"
    end,
    mapping = {
    ['<C-Space>'] = cmp.mapping(cmp.mapping.complete(), { 'i', 'c' }),
    ['<CR>'] = cmp.mapping.confirm({ select = true }),
    ['<Tab>'] = cmp.mapping(function(fallback)
        if cmp.visible() then
            cmp.select_next_item()
        else
            fallback() -- 默认的<Tab>行为
        end
    end, { 'i', 's' }),
    ['<S-Tab>'] = cmp.mapping(function(fallback)
        if cmp.visible() then
            cmp.select_prev_item()
        else
            fallback() -- 默认的<S-Tab>行为
        end
    end, { 'i', 's' }),
},
    sources = cmp.config.sources({
        { name = 'nvim_lsp' },
    })
})

debug_print("nvim-cmp 配置完成")

-- 配置 LSP
local capabilities = vim.lsp.protocol.make_client_capabilities()

-- 设置 clangd
lspconfig.clangd.setup({
    capabilities = capabilities,
    cmd = { "clangd" },
    on_attach = function(client, bufnr)
        debug_print("clangd 已附加到缓冲区")
        -- 设置基本的快捷键
        vim.keymap.set('n', 'gd', vim.lsp.buf.definition, { buffer = bufnr, desc = 'Goto Definition' })
        vim.keymap.set('n', 'K', vim.lsp.buf.hover, { buffer = bufnr, desc = 'Hover Documentation' })
    end
})

debug_print("clangd 配置完成")

debug_print("配置加载完成!")
配置完成后,我的nvim配置文件夹是这样的结构
C:\USERS\JACK\APPDATA\LOCAL\NVIM
│  init.lua
│
└─pack
    └─my-plugins
        └─start
            ├─cmp-nvim-lsp-e6b5feb2e6560b61f31c756fb9231a0d7b10c73d
            ├─nvim-cmp-5533c352c6c327de97f18b01fb1fda792dc80081
            └─nvim-lspconfig-0.1.3
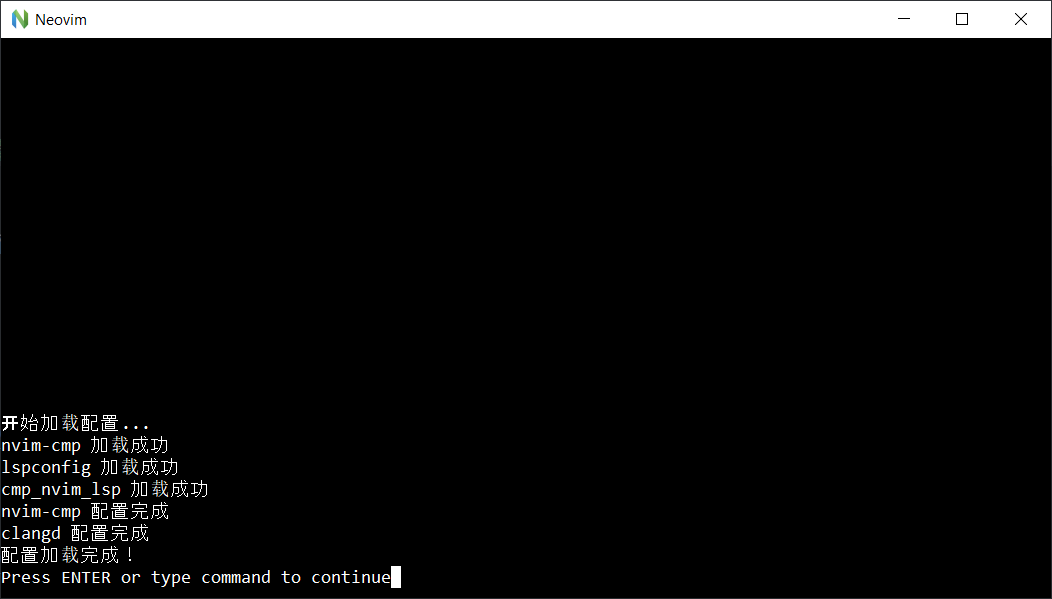
直接重启nvim,应该没有错误的话就输出各种成功语句
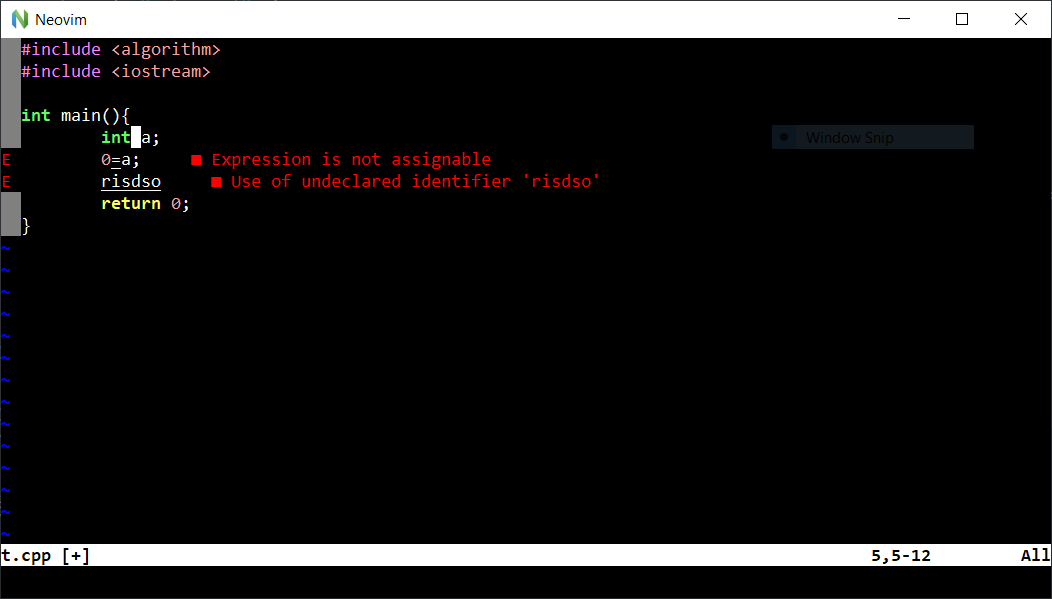
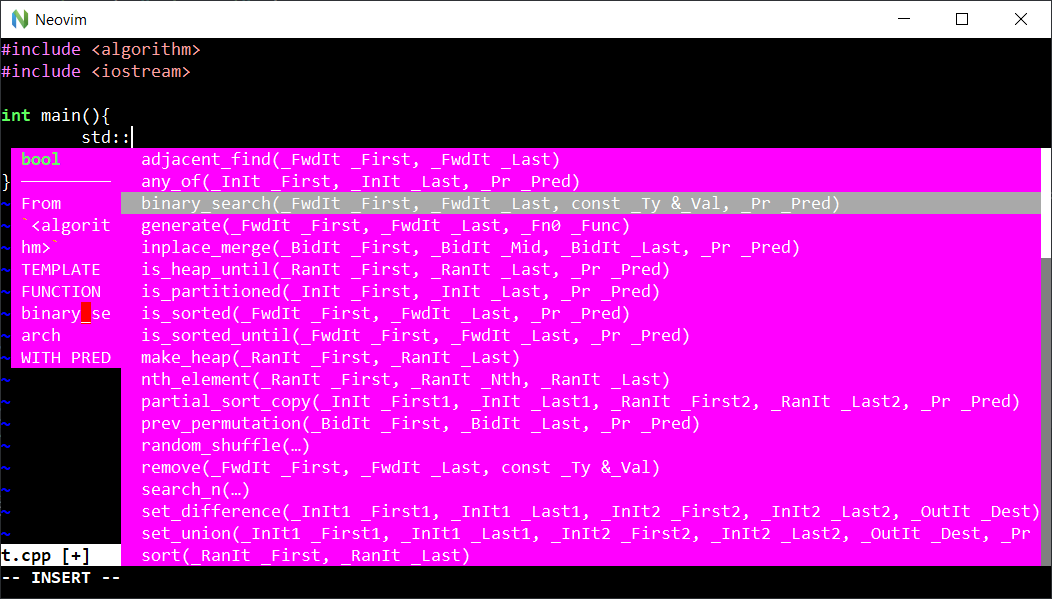
实时的代码提示
错误提示