介绍
dlib 是一个用 C++ 编写的通用开源库,提供了丰富的机器学习、数值计算、图像处理和深度学习工具。它以模块化设计著称,既适合快速开发原型,也可以用于高性能生产环境。
在机器学习方面,dlib 支持多种经典算法,例如支持向量机(SVM)、k-近邻(k-NN)、随机森林、线性/非线性回归等,同时提供了向量归一化、特征选择和核方法等工具,方便构建高效的模型。
dlib 的深度学习模块(dlib::dnn)基于现代卷积神经网络设计,支持全连接、卷积、池化、ReLU 等常用层结构,并提供 dnn_trainer 接口,可监控训练过程、调整学习率和批量大小,适合图像分类、对象检测、回归和其他监督学习任务。
此外,dlib 还提供了图像处理、特征点检测、人脸识别、矩阵运算、并行计算等功能,库本身跨平台且依赖少,可在 Windows、Linux、macOS 等系统上无缝运行。
下载和编译安装
dlib的官网:https://dlib.net/
dlib的github地址:https://github.com/davisking/dlib
从github拉取源码,解压。需要使用cmake和mingw进行编译
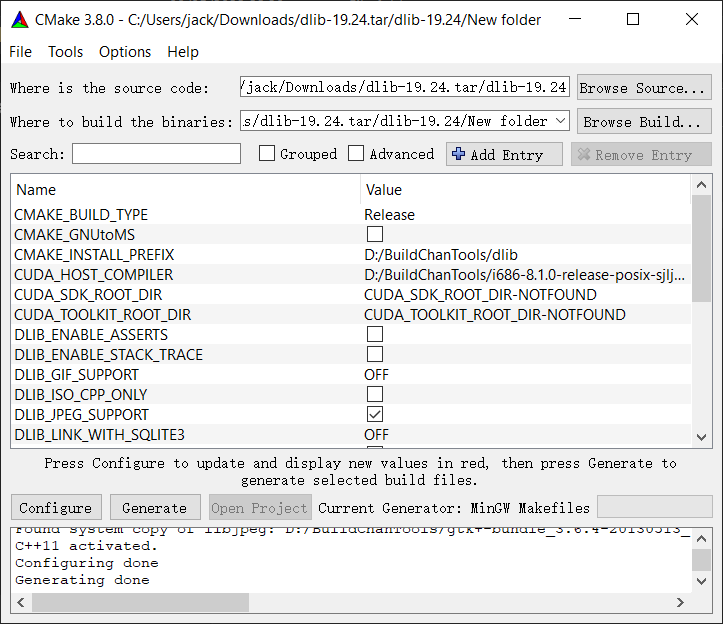
打开cmake-gui,选择源码目录和设置输出目录,点击configure,选择编译系统的makefile文件类型。点击finish

之后出现红色条目,可以改一些选项,比如设置库安装目录
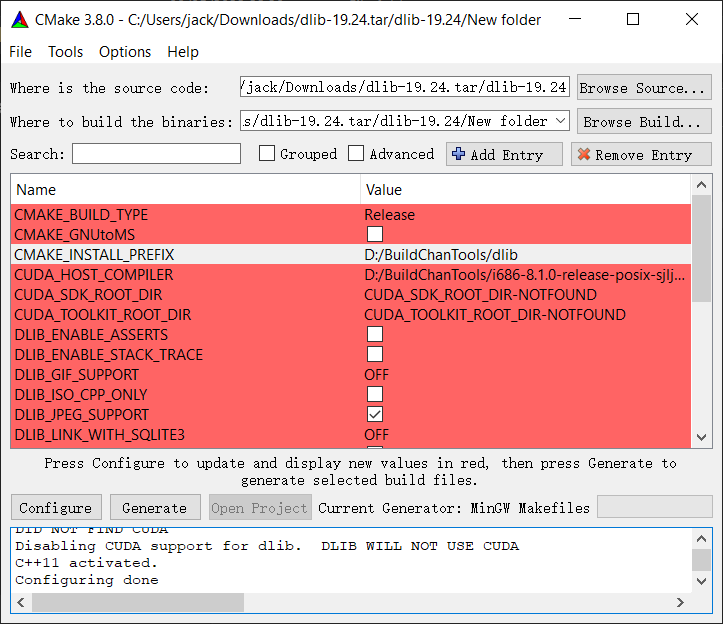
设置好后再次点击configure,恢复正常颜色,点击generate生成makefile文件
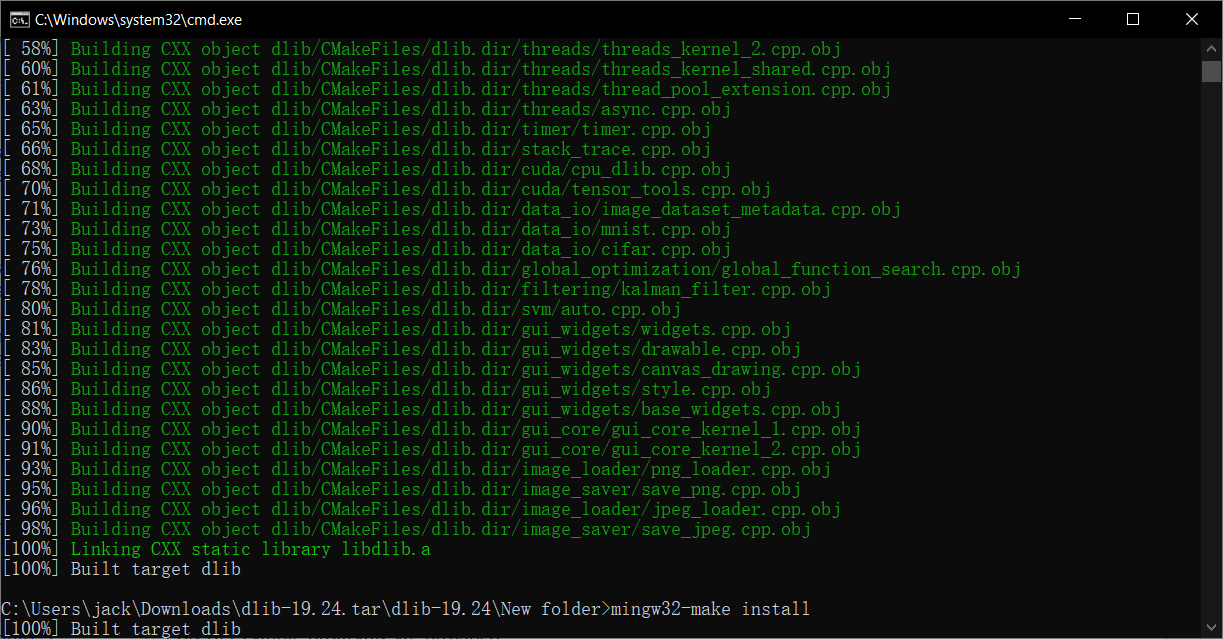
到输出目录,打开cmd,输入下面的2个命令进行编译和安装
mingw32-make
mingw32-make install
安装结束后,在安装目录下可以看到库文件,会发现只有2个文件夹,include/和lib/,这就是之后需要使用的库文件
测试
写c++程序并且进行编译链接测试,编译链接命令很简单,指定dlib库文件的头文件目录和链接库目录,链接库文件就行了
g++ main.cpp -o main.exe -ID:\BuildTools\dlib\include -LD:\BuildTools\dlib\lib -ldlib
./main.exe
下面的就是我运行了几个测试例子:
用 dlib 做线性回归
#include <dlib/matrix.h>
#include <dlib/svm.h>
#include <iostream>
#include <vector>

using namespace std;
using namespace dlib;

int main() {
    // 定义输入特征类型,这里是2维特征
    typedef matrix<double,2,1> sample_type;
    typedef radial_basis_kernel<sample_type> kernel_type;

    // 构造训练数据
    std::vector<sample_type> samples;
    std::vector<double> labels;

    // 简单数据:y = 2*x1 + 3*x2 + 5
    for(double x1=0; x1<10; x1++) {
        for(double x2=0; x2<10; x2++) {
            sample_type m;
            m(0) = x1;
            m(1) = x2;
            samples.push_back(m);
            labels.push_back(2*x1 + 3*x2 + 5);
        }
    }

    // 创建线性回归器
    vector_normalizer<sample_type> normalizer;
    normalizer.train(samples);
    for(auto& s : samples) s = normalizer(s);

    // 使用线性回归训练
    svr_trainer<kernel_type> trainer;
    trainer.set_kernel(kernel_type(0.1));
    decision_function<kernel_type> df = trainer.train(samples, labels);

    // 测试预测
    sample_type test;
    test(0) = 4;
    test(1) = 5;
    test = normalizer(test);
    double prediction = df(test);

    cout << "Predicted value: " << prediction << endl;
    cout << "True value: " << 2*4 + 3*5 + 5 << endl;

    return 0;
}
结果
Predicted value: 28.0355
True value: 28
二分类 SVM 的 C++ 示例
#include <dlib/svm.h>
#include <iostream>
#include <vector>

using namespace std;
using namespace dlib;

int main() {
    // 定义每个样本的特征类型,这里是2维
    typedef matrix<double, 2, 1> sample_type;
    typedef radial_basis_kernel<sample_type> kernel_type;

    // 准备训练数据
    std::vector<sample_type> samples;
    std::vector<double> labels;  // +1 或 -1

    // 类别1: 点在圆心(2,2)附近
    for(double x=1; x<=3; x+=0.5) {
        for(double y=1; y<=3; y+=0.5) {
            sample_type s;
            s(0) = x;
            s(1) = y;
            samples.push_back(s);
            labels.push_back(+1);
        }
    }

    // 类别2: 点在圆心(7,7)附近
    for(double x=6; x<=8; x+=0.5) {
        for(double y=6; y<=8; y+=0.5) {
            sample_type s;
            s(0) = x;
            s(1) = y;
            samples.push_back(s);
            labels.push_back(-1);
        }
    }

    // 数据归一化
    vector_normalizer<sample_type> normalizer;
    normalizer.train(samples);
    for(auto& s : samples) s = normalizer(s);

    // 创建 SVM 训练器
    svm_c_trainer<kernel_type> trainer;
    trainer.set_kernel(kernel_type(0.5));
    trainer.set_c(10);  // 惩罚参数,越大越严格

    // 训练模型
    decision_function<kernel_type> df = trainer.train(samples, labels);

    // 测试预测
    sample_type test1, test2;
    test1(0) = 2; test1(1) = 2;   // 类别1
    test2(0) = 7; test2(1) = 7;   // 类别2
    test1 = normalizer(test1);
    test2 = normalizer(test2);

    cout << "Prediction for test1: " << df(test1) << " (Class: " << (df(test1)>0?"+1":"-1") << ")" << endl;
    cout << "Prediction for test2: " << df(test2) << " (Class: " << (df(test2)>0?"+1":"-1") << ")" << endl;

    return 0;
}
输出
Prediction for test1: 1.18366 (Class: +1)
Prediction for test2: -1.18362 (Class: -1)