Two ways to configure Geany for C/C++ code completion on Windows
Implement code completion using a tags file
Generate tags file using universal-ctags
Using ctags to generate tags files for C/C++:ctags-win32
After downloading, unzip. Open cmd in the current directory and run the command to generate the tags file.
ctags -R --c++-kinds=+p --fields=+iaS --extra=+q --languages=c++ -f gtk3.c.tags D:\BuildTools\gtk+-bundle_3.6.4-20130513_win32\include\gtk-3.0\gtk
Among them, gtk3.c.tags is the name of the tags file generated in the current directory. D:\BuildTools\gtk+-bundle_3.6.4-20130513_win32\include\gtk-3.0\gtk is the directory of scanned C/C++ library header files
Generate tags file using Geany
Before Geany 2.0, the tags file used by Geany seemed to be incompatible with the tags file generated by universal-ctags, and could only use tags files generated by Geany.
Geany uses its own tags file format, similar to what ctags uses (but is incompatible with ctags). You use Geany to generate global tags files, as described below.
In the Windows system, since commands enclosed by ` are not supported, it is first necessary to manually set the CFLAGS environment variable.
pkg-config --cflags gtk+-3.0
-mms-bitfields -ID:/BuildTools/gtk+-bundle_3.6.4-20130513_win32/include/gtk-3.0 -ID:/BuildTools/gtk+-bundle_3.6.4-20130513_win32/include/cairo ......

set CFLAGS=-ID:/BuildTools/gtk+-bundle_3.6.4-20130513_win32/include/gtk-3.0 -ID:/BuildTools/gtk+-bundle_3.6.4-20130513_win32/include/cairo ......
Then generate the tags file
geany.exe -g gtk3.c.tags D:/BuildTools/gtk+-bundle_3.6.4-20130513_win32/include/gtk-3.0/gtk/gtk.h
But when I tested the tags file generated by Geany, it had function symbols but no struct symbols. So Geany cannot autocomplete structs. I don't know what the problem is.
The official documentation explains how to use Geany to generate tags files:https://www.geany.org/manual/current/index.html#symbols-and-tags-files
Generating tags files using Geany
You can generate your own global tags files by parsing a list of source files. The command is:
geany -g [-P] <Tags File> <File list>
Tags File filename should be in the format described earlier -- see the section called Global tags files.
File list is a list of filenames, each with a full path (unless you are generating C/C++ tags files and have set the CFLAGS environment variable appropriately).
-P or --no-preprocessing disables using the C pre-processor to process #include directives for C/C++ source files. Use this option if you want to specify each source file on the command-line instead of using a 'master' header file. Also can be useful if you don't want to specify the CFLAGS environment variable.
Example for the wxD library for the D programming language:
geany -g wxd.d.tags /home/username/wxd/wx/*.d
Generating C/C++ tags files using Geany
You may need to first setup the C ignore.tags file.
For C/C++ tags files gcc is required by default, so that header files can be preprocessed to include any other headers they depend upon. If you do not want this, use the -P option described above.
For preprocessing, the environment variable CFLAGS should be set with appropriate -I/path include paths. The following example works with the bash shell, generating a tags file for the GnomeUI library:
CFLAGS=`pkg-config --cflags libgnomeui-2.0` geany -g gnomeui.c.tags \
/usr/include/libgnomeui-2.0/gnome.h
You can adapt this command to use CFLAGS and header files appropriate for whichever libraries you want. Generating tags files on Windows using Geany
This works basically the same as on other platforms:
"c:\program files\geany\bin\geany" -g c:\mytags.php.tags c:\code\somefile.php
Use the tags file
Method One
Open Geany, then directly go to the menu bar, Tools, Load Tags File, and select the generated Tags file to load it.
Method Two
Place the generated Tags file in the data/tags/ directory of Geany's installation directory, and Geany will load it directly upon startup.
This directory already has some default tags files:
entities.html.tags
std.pas.tags
std.php.tags
std.py.tags
std99.c.tags
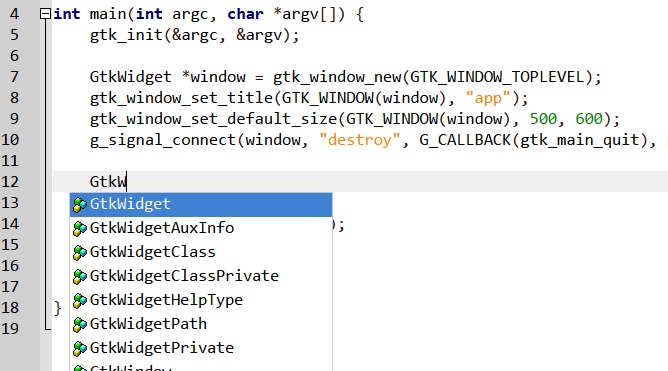
Finally, the tags code completion appeared
The configuration of the LSP Client.
Using an LSP client plugin to complete code is more powerful and flexible than using tags files. First, you need to download the LSP server clangd:https://github.com/clangd/clangd
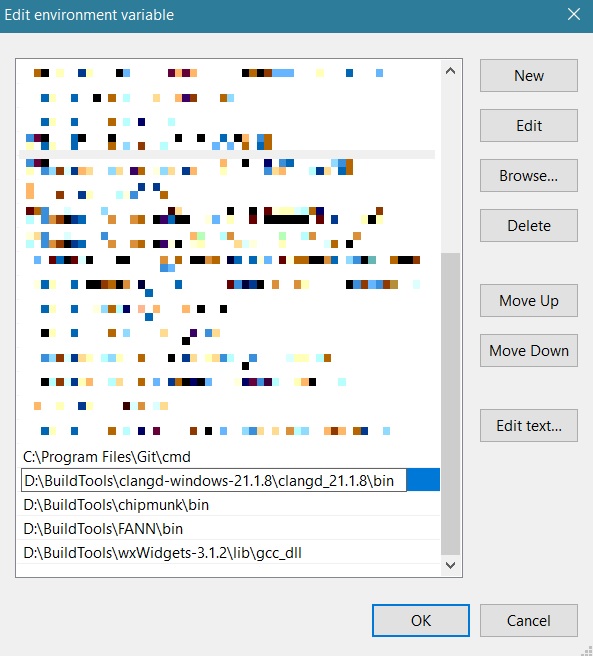
After downloading, extract it and add the directory where clangd is located to the PATH environment variable of the Windows system.
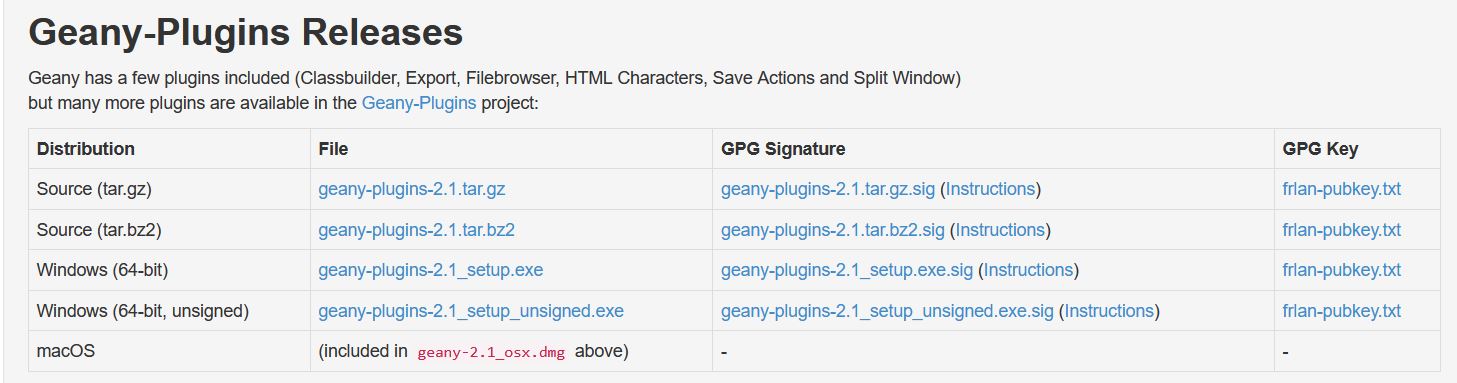
Download and install the Geany plugin, selecting the plugin version that corresponds to your Geany version:https://www.geany.org/download/releases/
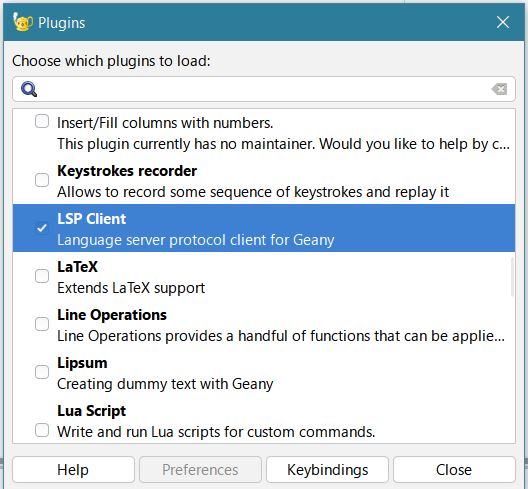
After installing the plugin, open Genay, go to the menu bar, Tools, Plugin Manager, and check LSP Client.
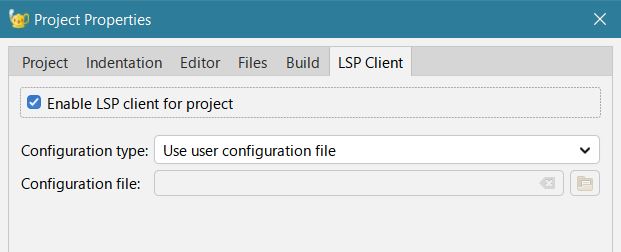
You need to manually enable the LSP service in the Geany project configuration properties.
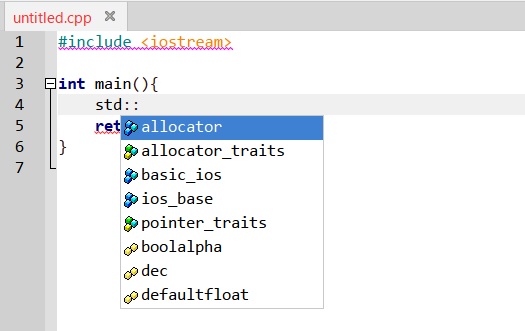
Afterwards, the code had LSP completion
The official documentation explains how to configure LSP code completion:https://plugins.geany.org/lsp.html#configuration
Configuration
The plugin does not come bundled with any language server; these must be installed independently of the plugin. For installation and configuration instructions, please refer to the documentation of the specific servers you plan to use, as some may have specific requirements. Note that many language servers, such as clangd, pylsp, and gopls, are often packaged by Linux distributions, making them easy to install and use.
You can configure servers and other settings using the User configuration file, accessible from:
Tools->LSP Client->User configuration
This file provides extensive information about all the settings options, so be sure to refer to it for more details. The default configuration file comes with pre-configured values for several language servers; other servers have to be added manually.
By default, the LSP plugin is disabled unless explicitly enabled for a project under
Project->Properties->LSP Client
This behavior can be controlled by the first three configuration options in the [all] section of the configuration file.
Language servers are started lazily, meaning they only launch when you switch a tab to a file with a filetype that has a corresponding LSP server configured. After the initial handshake between the client and server, you can check the result under
Tools->LSP Client->Server Initialize Responses
This file also provides information about the capabilities offered by the server; for more details, refer to:
https://microsoft.github.io/language-server-protocol/specifications/lsp/3.17/specification/
In addition to the User configuration file, you can also create a per-project configuration file (which can also be shared by multiple projects). This file can be configured under the
Project->Properties->LSP Client
tab.
Furthermore, the plugin offers a range of customizable keybindings, which can be configured from:
Edit->Preferences->Keybindings->LSP Client